Overview
Having digital notes is a nice way to keep your thoughts or research organized. Sharing and presenting your notes in this way is as easy as copy and paste. However, with this accessibility, it can be easy for someone to take or delete your digital notes.
In this article, we will look at a nice way to create an encrypted volume that is protected by a password. Then, install Joplin, a free, open source note-taking application, in that volume to keep your notes nice and secure.
When everything is finished, you will have an encrypted file that you will be able to mount to your system with VeraCrypt. Then, enter that volume and open Joplin for some serious note-taking.
Installing VeraCrypt
Go to the VeraCrypt site to find download links for different versions of VeraCrypt for different operating systems.
You will want to choose the operating system that you want to install VeraCrypt to. For example, to install on Windows 10, choose the install for Windows 8 or later:

Follow the on screen directions to install VeraCrypt.
In this tutorial, we will be using the Windows version of VeraCrypt seen above. There may be some differences in the screenshots from what you are seeing if you are using an Apple or Linux computer.
Creating a new encrypted volume
With VeraCrypt, there are different ways to create an encrypted volume. For this tutorial, we will create an encrypted file container to install Joplin in. This is a fancy way of saying that we will create single file that will be our encrypted volume.
Open VeraCrypt. You should be looking at a screen similar to the one below:

Click the “Create Volume” button:

At this point, we will be choosing “Create an encrypted file container”. As a side note, it is possible to use VeraCrypt to encrypt a thumb drive with the “Encrypt a non-system partition/drive” option.
Next, we will choose “Standard VeraCrypt volume”.
At this screen,

Click the “Select File…” button and choose the location and name of your encrypted container. For example, I will be storing mine in Documents -> vcrypt as a file called “encrypted_volume”. Very subtle :-):


Next, we will choose the algorithm used for encryption. If you are not sure which algorithm that you would want to use, the default is fine.
Now, we will choose how large the container will be. The size that you choose will be the size of the file that will be created. In my case, I will create a 500 MB volume. This means that my “encrypted_volume” file above will be 500 MB:

Next, we choose our password. This will need to a strong password. VeraCrypt has a nice description in this window of what a strong password is. At the least, you will want to have a password that is not found in a dictionary, that contains upper and lowercase letters, along with numbers and at least one special character. For example, you can start by choosing a dictionary word like “Godzilla” (just hear me out ;-)). Then, swap numbers for some of the letters in the word “G0dz1ll4”. Finally, add in more numbers and a special character for a decent password, “19G0dz1ll485%”.
On the next screen, you will just need to move your mouse over the window until the bar fills up completely. This helps in creating your encryption key for your file:

Now, click Format to create your encrypted volume. If everything goes well, you will get a message of success:

Let’s exit the wizard and mount our new encrypted volume!
Back at the VeraCrypt opening page, click the “Select File…” button and go to the folder that you created your encrypted volume in. In my case, that would be Documents -> vcrypt:

Choose the encrypted volume and click Open. The window will close, leaving you at the VeraCrypt opening page again. Choose a drive letter in the table above by clicking it:

Click Mount and enter your strong password for the encrypted volume that you created:

After clicking OK, your encrypted drive will be mounted:

You can see your new drive by going into your file explorer and going to “This PC”:


At this point, you have your very own encrypted volume that can only be accessed through VeraCrypt with your password! All the files in the drive will only be accessible if the encrypted volume is mounted through VeraCrypt.
Be sure to dismount your volume when you are finished with it. You will do that by opening VeraCrypt, clicking the drive where the volume is mounted, then clicking Dismount.
Installing Joplin
The next step is to install the portable version of Joplin in our encrypted volume.
Go to the Joplin site. Scroll down to the “Installation” section. Below the table in the Desktop Application section, you will see a link to the “Portable version”:

Save the downloaded JoplinPortable.exe file in your encrypted container:

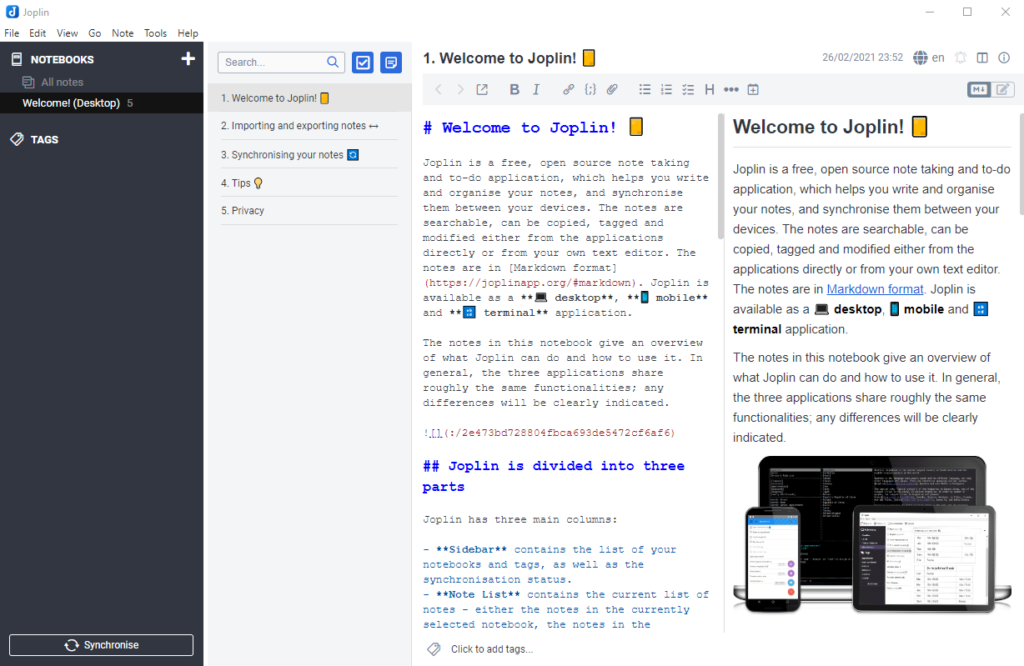
Double-click the JoplinPortable.exe program and wait for Joplin to do an initial setup. Then, PRESTO! You will be greeted with the Joplin interface:

Now, all your Joplin notes will be stored within your encrypted volume! For a tutorial on how to use Joplin, have a look at Joplin’s home page. Joplin uses the ever popular “markdown” markup language to create beautiful notes. Here are a few sites that have nice tutorials to get you started with markdown:
- https://www.markdowntutorial.com/ (very nice way to learn to use markdown)
- https://joplinapp.org/markdown/
- https://www.markdownguide.org/
If you have any questions, let me know in the comments below.
